queen bee cute animation 1 pictures, backgrounds and images

Saturday, July 31, 2010

Special for my hubby....

So after I made all the kids bottles for my son's party next week, my hubby asks me where is his???  I was really surprised that he wanted one.  So my hubby loves to ride his motorcycle.  In fact, that's all he wants to do.  So I thought I have to put a motorcycle on his bottle for sure.  So I went hunting on Google images for a motorcycle silhouette.  I knew that it would need to be dark in order for SCAL to trace the image in.  

Now for the lettering on his bottle.  Quite some time ago I had said that my hubby is always dealt a crappy hand in life......but that I was so proud of him that he was able to turn that crappy hand into 4 aces.  From that point on, his motorcycle tag is 4 ACES.  That is what I decided to put on the bottle.

OK So i wasn't thinking when I took the pics.....sorry you're all turning your heads sideways!!!

 So as you can see I had to twist and and take a pic and twist and take a pick and twist....well I'm sure get the point.


The last pic you can see the cutouts on the vinyl and that is what's wrapped around the entire bottle!  Minus the shoes you see there haha!!


Saturday, July 24, 2010

BLOG AWARDS!!!!

LOVE.THAT.BUG stopped by my blog.....while she was there she decided to give me not 1 but two awards!!  Thanks Stacy!!!
So I went back to Stacy's Blog and here's the 2nd part to getting this award.  I now get to pass it on to 10 others :O)

Now, I need to pass these off to 10 blogs. In no random order, here they are:

Congrats to you all!!!  I was so happy to pass along these 2 awards to you!!!!  Please stop by their blogs and check them out - they all have beautiful stuff!!!!! :O)

Wednesday, July 21, 2010

Vinyl Meets Aluminum .....

So my son's B-day is coming up in a couple of weeks.  We're doing a pool party which should be a blast.  I wanted to do something really neat for all the kids so I decided I would make them goodie bags and make each kid their own bottle.

So first I started out with the names: 


The I cut a bunch of circles on the cricut.  2 sizes 1 inch and 1.5 inch circles.  I started applying them in random order on the bottles.  


My son's bottle is green, cause he's the b-day boy so he can have a different color.  I didn't want red dots on it as it would remind me of X-mas every time I saw it.  So I picked a diff color for his smaller dots 


Just a couple more pics:


I am pretty happy with the way they turned out!

Monday, July 19, 2010

MY NEW BUTTON

So I was trying to figure out how I can make my own button for my blog and i was searching around on the net and came across this page

make-your-own-button-for-your-blogger

So after I read the instructions a few times I started plugging my own info in and TADAAAA!!!!
I had a new button~
 You can see it on the right side of my blog!!  I'd love for you to take my button and post it on your page....please let me know if you do!!!


Thursday, July 15, 2010

New Cricut Cartridge!!!!

WOW, I was super excited about getting this cartridge!!!  I knew I just had to have it ever since I saw it's 1st appearance.

It showed up in my mailbox today - I was super excited!!!!

Monday, July 12, 2010

Canvas Tote Bag

So I saw a really cute bag that, Leslie (http://cardmkrleslie.blogspot.com/) had on the Cricut message board as well as her blog site. With her HUGE help, she got me a bag at her local X-mas shop, since I don't have one here, and she sent me the bag and some Heat Transfer Vinyl (HTV). So after being scared about what to do, I decided that I would cut with contact paper to see how the cuts would come out and to also see the sizing for my bag. Here's the bag before I got started:
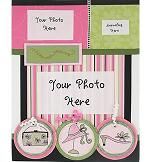
here's what I did with my contact paper cuts.......a LO to use for later on:

Here's DS and me working on what to cut on the new vinyl:
After cutting the vinyl....it was time to iron-on


Next it was time to check on the pieces to see if they were ready.....


So here I am peeling the plastic layover off the shells:


The front completed!!!!!


Here's where the vinyl did something weird. I'm not sure because the image is with thinner/smaller pieces or what, but here's my name on the back of the bag:


So that's pretty much it!!!! I really enjoyed spending my time working on this too!!!!

Please leave a comment, I'd love to hear what you think!!!!

Sunday, July 11, 2010

Being crafty

Well, I decided that I wanted to make something for the new beach theme bathroom I've worked so hard on (with hubby of course). I was out shopping for a trashcan and I just couldn't find the right one. Then it hit me....I can make one!!!

So here it is:

I was pretty pleased how it turned out! I bought the starfish and sand dollar and I had the shells you see on the rim, I just hot glued everything and BAM....it's done!!!!!